Showing posts with label Kerala dish. Show all posts

Friday, February 28, 2014

Tomato Curry/Takkali curry

A simpe tomato curry with coconut perfect to go with flat breads and rice.


Tomato-2 nos(sliced long)
Onion-1 medium(sliced long and thin)
Green chilli-1 no(sliced to round)
Turmeric-1/4 tsp
Red chili powder-1/2 tsp
Coriander powder-1/2 tsp
Grated coconut-1/8 cup+ 1 tbsp
Salt to taste
Coconut Oil-2 tsp
Mustard-1 tsp
Curry leaves
Coriander leaves-1 tsp(chopped)


Method of preparation:
1. Heat oil in a pan. Sputter mustards and then add curry leaves.
2. Then add the chopped onion along with green chilies and fry them till it is golden brown and transparent.
3. Add tomatoes and mix well. cook for 2 minutes and then add the powders along with salt.
4. Mix well and cook it till tomatoes are soft.
5. Grind the coconut along with little water to a smooth paste.
6. Mix the coconut paste to the tomato mixture along with water to make a curry.
7. Heat the curry till the coconut mixture boils. Check for salt and add accordingly. Turn off the heat and then add the coriander leaves and mix well.
8. Serve with rice or with flat breads.

Sunday, February 2, 2014

Idli

Idlis with sambar and chutney is a traditional breakfast that you will find in  south Indian houses. They are made by steaming a batter of fermented  rice and urad dal.


Idli rice-1 cup
Whole Urud dal -1/2 cup(without skin)
Fenugreek Seeds-1/2 tsp
Water as required
Salt as required

Method of Preparation:
1. Wash the rice and urud.
2. Soak the rice with fenugreek and urud in different vessels with sufficient water over night or for min 4 hours.
3. Grind the urud first with the little soaked water to smooth paste.Add more water if needed. The end product should be a thick. So add water only if really needed. Transfer it to a big vessel.
4. Drain the water from the rice. Grind the rice and fenugreek using the water from the soaked urad dal. You can use plain water too.
5. Grind it to smooth but slightly coarse paste with minimal water.
6. Mix this with the urad paste. Add salt and mix it with clean hands for some time. The batter should be medium thick.
7. Set it on a warm place to ferment overnight. When the batter is fermented it will rise by the next day morning.

To make idlis:
1. Mix the batter nicely with the ladle. If batter is too thick add little water. Check for salt.
2. Pour water into the steamer and keep it to steam. Oil the idli tray.I prefer using coconut oil. Pour about 3/4 full of batter into the tray and keep it on heat and steam it for 10 minutes on medium heat.
3. By this time the idlis will be done.To check them insert a stick/back of spoon and if it comes out clean, remove the tray from heat. Using a spoon remove the idlis from the idli tray.  Pour more batter into the vessel and steam if making more idlis.Serve with chutney powder/chuney or sambar.


Friday, April 12, 2013

Chutney Podi/Chutney powder

Chutney podi using coconut is something I have never tried or I should say that Idli podi is the only one I have ever done. When Nagalakshmi said this recipe for cook along in Kerala Kitchen I was eager to try it out and glad that I could make it. We have been using it with rice, breakfast till now and it goes very well with the spicy and very slight(barely noticeable) tangy taste. If you are planning to try this you might want to reduce spice if planning to feed kids. I used store bought coconut powder to prepare it and it tasted real good. The time required to make it was less as the coconut powder was dry. Go ahead and try this.


Coconut-2 cups(grated/dry grated powder)
Dry red chilies-10 nos(add more or less according to preference)
Ginger-2" piece(sliced)
Curry leaves-3 strands
Urad dal-2 tsp
Black pepper-1 tsp
Shallots-1/2 cup(sliced)
Asafoetida-1/2 tsp
Tamarind- Small piece
Salt- 2 tsp

Method of preparation:
1. Heat a pan on low heat and fry the coconut,dry chili,ginger,curry leaves, urad dal, black pepper,shallots till coconut turns brown.

2. When done turn off heat and add asafoetida, salt and tamarind and give a stir. Set aside to cool.
3. When cooled, grind this to fine/coarse powder and store in a airtight container.
4. Serve as side for rice,dosas,idlis.


Notes:
1. See that you don't burn the coconut powder instead of browning.
2. Add dry chili as needed for heat.

Friday, April 5, 2013

Parippu Vada/Lentil Fritters

Some snacks holds tons of memories in it..This is one such thing..Its been the part of so many wonderful years of train travel's that I cherish..These are easy to prepare and delicious to munch on..

Chana Dal-1/4 cup
Toor dal-1/4 cup
Fennel Seeds-1/4 tsp
Pearl Onion-4 nos
Green chili-2 nos
Asafoetida-2 pinch
Ginger-1 tsp finely chopped.
Curry Leaves-1 sprig
Salt to taste
Oil to fry.

Method of Preparation:
1. Soak chana dal and toor dal for min. 3 hours. Wash and drain the water.
2. Set aside about 2 tbsp of dal and then grind the remaining to coarse pieces along with pearl onions, chilli, ginger, fennel, curry leaves, asafoetida and salt.
3. See that the dal is just pulsed to bits and not to paste.
4. Transfer to a clean dry bowl, add the 2 tbsp of dal and check for seasoning.
5. Heat oil in a wok.Take a small round ball of dough and lightly press between the palm to flatten it.
6. Deep fry in medium low heat so that the inside gets cooked and outer covering is crispy and browned.
7. Serve hot with tea.

Notes:
1. You can grind the lentils and then crush the other ingredients and mix it separately instead of grinding/pulsing together.
2. Shape them according to how you want them, If you need crispy vadas make them thin discs, else thicker ones.
3. The oil should be on medium heat, if too hot they will turn dark and wont be cooked inside.

Thursday, February 21, 2013

Kappa Masala/Tapioca Masala

As in any part of world, Kerala too has a diverse character when it comes to food and culture. Since here we are speaking about food the south and north of Kerala have a wide difference there.... Now that I belong to this part I totally love the food there and love to cook it..When Nags started the Kerala Kitchen group in fb,  I was interested to learn new recipes and so joined there. The very first one being Tapioca masala by Edible Garden.
Tapioca is accepted whole heartily in my family and the recipe was a bit different from my normal ones...We totally enjoyed having a twist to our normal dish..


Tapioca-3 cups(cubed)
Turmeric-1/4 tsp
Dry red chilies-3 nos
Garlic-2 to 3 nos
coconut Oil-1 tbsp
Mustard seeds-1 tsp
Split urad dal-1/2 tsp
Curry leaves- few
Salt to taste


Method of Preparation:
1. Peel tapioca and then roughly cube them to small pieces. Add them to a vessel along with a pinch of turmeric powder and wash thoroughly.
2. Add them to a vessel/ pressure cooker with required amount of water and cook till it is done. If cooking in cooker you will have to get 1 or 2 whistle with heat on medium.Once done drain the water and set aside.
3. Coarsely crush garlic and dry red chilies using a motar and pestle or a mixer.
4. Heat oil and add mustard seeds, when they pop add split urad dal along with curry leaves. Let dal turn golden.
5. Add the ground garlic mixture to this along with turmeric powder and salt.Mix for a second and then add the cooked tapioca and mix well till spices coat.See that the heat is on low or you will burn the spices.
6. Turn off the heat and serve.

 Notes:
1. Change the amount of garlic and chilies according to your taste.
2. If cooking tapioca with turmeric powder then do not add turmeric while mixing it with other ingredients.

Wednesday, February 6, 2013

Kerala Naranga Achaar/ Lemon/Lime Pickle

Pickle is a condiment that is very popular in Indian food culture. Naranga achaar is a spicy tangy pickle.


 Lemon/Lime-20 nos
Water -Enough for steaming the lemons
Sesame Oil/Gingely Oil - 3 tbsp
Mustard Seed-1 tsp
Whole Dried Red Chili - 4 nos
Curry leaves-1 to 2 sprig
Salt as required
Garlic - 8 cloves
Green Chilies- 10 nos(cut to small rounds)
Turmeric Powder- 1/2 tsp
Red Chili Powder- 2 tbsp(add more if needed)
Fenugreek Powder- 1/4 tsp
Asafoetida Powder- 1/4 tsp
Vinegar- 1 tbsp


Method of Preparation :
1. Boil some water in a steamer and steam the lemons/limes for some time. Say 15 to 20 mins till it becomes soft. Remove and wipe the lemons dry. Let cool.
2. Cut the lemon into  halves/four/eight pieces. According to the size you need them.
3. Add salt to these lemon pieces, mix well and keep for 10 to 15 days in a clean dry airtight glass jar in room temperature. Shake the jar once everyday.
4. Slice the garlic pods lengthwise and set it aside.Wash,dry green chilies and then cut to small pieces.
5. Heat sesame oil in pan. Add the mustard seed, when  it starts spluttering, add the curry leaves and dry red chilies and saute for 30 second.
6. Add the garlic slices,green chilies into it and saute for few seconds. See that it doesn't turn brown.
7.Lower the flame. Add the red chili powder, asafoetida powder, fenugreek powder and saute for couple of  seconds then turn off the heat.
8. Allow the mix to cool down and then add the lemon slices,  mix well and adjust the salt.
9. Then add vinegar and combine well such that vinegar and pickle mixes well.
10. Transfer it in an airtight container and keep it in a room temperature for a week for the flavors to set and  then refrigerate it for further use.

Notes:
1. You can steam the lemons the previous night, wipe and keep for the water to dry. Same with the green chilies, wash and keep aside to dry.
2. You can cook the lemon till it is tender instead of steaming.
3. Adding green chilies is not compulsory. If making in large quantities adding green chilly may be a reason for reducing shelf life of pickle.
4. Add about 1/4 or less cup of water to make a gravy. Heat for some time and then turn off the heat.
5. Lower the flame while adding spices else you will burn them.
6. See the lemon/lime becomes just soft not mushy and break while steaming.
7. You ca use lemon,lime,combo of both for this pickle.


Thursday, December 6, 2012

kothu parotta

Like most of the animals that go on hibernation once cold starts I too went into that mode not because of cold but due to the lack of light...Everything about the winter is so good..the cold days...a blanket of snow...the lovely mood of laziness around..except the missing of sun..:( I would have so much loved the presence of sun....
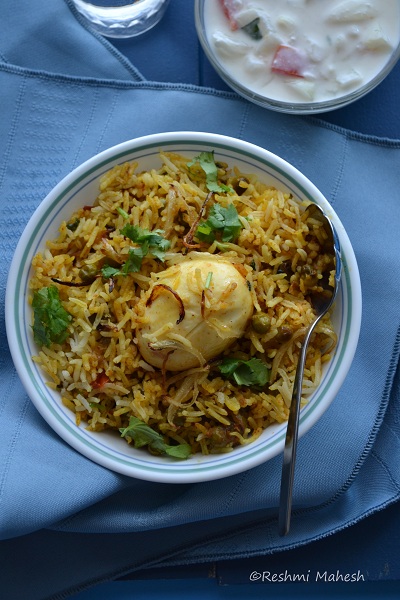
To warm up these winter nights I went with a recipe that is warm and spicy...I was introduced to Kothu parotta for the first time from Vasantha Bhavan hotel in calicut 3 years back...spicy and full of flavors. When we came to US frozen parotta was introduced to me...which I felt was like a thick piece of rubber which never dissolves how much ever you chew it...Sooner dinner with frozen parotta became a challenge and I had to find a way out...I remembered this dish and started to make it...Initially I just added garam masala and it was not much flavorful..then adding one by one masalas was an experiment...I am not sure if this is the traditional recipe/if this is how it is prepared..but this recipe is quite yummy.
A little info about Kothu parotta..It is a Tamil street food which slowly started appearing in hotels these days.  Kothu means: minced pieces and parottas are flat breads made on stove top using all purpose flour and liberal use of oil. In kothu parotta various veggies are  mixed with spices and torn pieces of parotta by using oil liberally.You can use egg too to prepare it and in that case it is known as Mutta kothu parotta.


Parotta-5 nos(cooked and torn/cut to small pieces)
Cloves- 5 nos
Fennel seeds-1 tsp
Cinnamon Stick- 1 inch stick
Bay Leaf- 1 leaf
Curry leaf-1 sprig
Onion- 1 medium(chopped finely)
Tomato- 2 large(chopped)
Carrots-1/4 cup(cut to thin sticks)
Green Beans-1/8 cup(cut to thin sticks)
Cabbage-1/8 cup(cut to fine shreds)
Green peas- 1/4 cup(I used frozen)
Ginger-garlic Paste- 2 tsps
Chili Powder- 2 tsp
Turmeric Powder- 1/2 tsp
Garam Masala- 1 tbsp
Biryani  Masala - 2  tbsp
Cilantro/coriander leaves for garnish
Oil-5 tbsp


Method of preparation:
1. Heat  oil in a pan. Add cinnamon,fennel,clove, curry leaf,bay leaf and fry for a minute. Then add ginger garlic paste and fry till raw smell goes. Add onion to this and fry till translucent and light brown.
2. Add tomatoes to this along with a pinch of salt and cook till it turns mushy and oil separates at sides.
3. Add turmeric,chili, garam masala and biryani masala and mix well and cook for a minute.
4. To this add the green beans, green peas along with carrot and mix well and cook till it is half done.
5. To this add the shredded cabbage and cook till it is soft yet crisp.Now add salt and mix well and cook for a minute or two.
6. Add the shredded poratta to this and mix well. Cook on medium heat for few minutes.Turn off the heat and garnish with cilantro
7. Squeeze little lemon over it and serve with raita.


Notes:
1. I used store bought frozen Kerala parotta which is widely used for this. You can make the same with chapathi too.
2. Be liberal in using oil.Add more if needed. The porotta should be fried in oil while cooking.
3. Before adding the tomatoes see that there is no much liquid which would result in soggy porottas which is a big NO.
4. You can use pav masala, chicken biryani masala in place of biryani masala too.
5. Add spices according to your level.
6. Add about 2 green chilies if you like heat.
7. If using small porottas use about 6 to 7.
8. You can use veggies of ur choice.Add or remove veggies as you like.


Tuesday, November 20, 2012

Egg Biryani

A healthy delicious breakfast, small fight with sister, a flavor packed lunch, movie with sis and parents, a visit to the park with friends has been a routine on Sundays during my childhood. Sunday lunch was always special at home. Everyone was there...enough time to enjoy and eat food...is a small part that I still adore...Unlike me Mom used to make variety rice only on Sundays or if guests are around...normal days the meal would be an elaborate one with curries, stir fries, rice, sides..Where as the lazy me loves to prepare variety rice everyday..


This is one such dish from her variety meal recipe...
Egg-3(Boiled and peeled)
Green peas-1/4 cup(frozen)
Ginger garlic paste-1 tbsp
Onion-1 no(thinly sliced)
Tomato-2 nos(big one)
Salt to taste
Onion-1/2 of medium one(thinly sliced)
Coriander leaves-2 tbsp
Oil-1 tbsp
Spices:
Bay leaves-2
Cloves-7 no
Fennel seeds-1 tsp
Cardamom seeds-1/4 tsp
Cinnamon-1 1/2 inch piece
Spice Powders:
Red chili powder-1 tsp
Turmeric powder-1/2 tsp
Coriander Powder-2 tsp
Biryani Masala-1& 1/2 tsp
To cook Rice:
Rice-1 1/2 cup
Water-21/2 cups
Salt to taste
Ghee-1 tsp


 Method of Preparation:
1. Cook the rice 80% with the required water,salt and ghee.Once cooked fluff the rice and set aside.The above measurement is given to cook rice in pressure cooker.
2. Boil and peel the eggs, slit them without cutting to edge and set aside.
3. Heat little oil/ghee in wok and fry the thinly sliced onions till turns golden brown. Drain and set aside.Then add oil in a wok. Add the spices to it and fry for few seconds.
4. Then add onion and ginger garlic paste and cook till it turns translucent. Add spice powders and mix well for a minute till raw smell goes.
5. Add tomato and cook till it is soft and mushy. Add peas and cook covered till it is soft.
6. Cook on low heat. Add a few tbsp of water if really needed.Add salt and mix well.
7. Now add the eggs and  give it a good mix along with a tbsp of coriander leaves.Turn off the heat.


To assemble:
1. Take a pressure cooker and add half of the masala at the bottom. Layer this with rice and add remaining masala and another layer of rice.
2.  Drizzle little ghee on top and close the lid. Cook on low heat with whistle on for 15 to 20 mins. See that it doesn't whistle.
3. Turn off heat and wait till the pressure goes for about 10 mins. Then open the cooker and transfer the biryani to a bowl. Add the remaining coriander leaf, fried onion and serve warm with a squeeze of lemon juice.


Notes:
1. Cook rice in the way you are comfortable with. The rice should be 3/4th cooked and have stand alone grains
2. Instead of cooking the biryani in pressure cooker you can cook it in oven too. In that case preheat the oven to 350F. Grease a baking dish. Layer half the masala and then half the rice. Add another layer masala and then rice. Add the fried onion on top and drizzle ghee on top.Cover and cook for 25 to 30 mins.
3. You can use green bean,carrots or a mix as veggie here.or use no veggie at all too.
4. If using dried variety of peas soak and cook earlier. Then add to the masala and continue cooking.
5. Add salt accordingly.


Wednesday, October 17, 2012

Kaaya Mezhukupuratti/Raw plantain stir fry

Kaaya means Raw plantain in Malayalam.As a kid I have seen this growing in my grandmas backyards and I have totally enjoyed eating it in all forms..be that  in curry or stir fry or snack or chips or the ultimate in ripe form..Now here is a simple preparation with this veggie...


Raw plantain-1 no
Salt to taste
Curry leaves-1 sprig
Coconut oil-2 tsp
Mustard seeds-1 tsp
Dry red chilies-2 no

Method of Preparation:
1. To clean the plantain: First cut the ends of plantain little bit(till the light yellow flesh shows up). Then peel the skin slightly from edges with a knife. I usually don't do this as raw plantain skin is edible. But do take care to remove any skin that is dark/black. Now cut the plantain half lengthwise and then each half again into 2 lengthwise. so total of four pieces. Now cut that to small pieces. and wash it in water with a pinch of turmeric powder.
2. Heat oil in a wok. Add mustard, curry leaves and red chilies. Let it splutter.
3. Drain and add the plantain pieces to it and give a good stir. Now pour enough water to cook it. See that the cubes are just soaked in water. Don't add too much as the result would be mushy stir fry. Cook it till its soft. when it is 3/4 done add salt to it and continue cooking till water is completely dried.
4. Serve with rice and sambar.


Notes:
1. Another way of cooking it with minimum ingredients is Cook the cubed plantain with water, 1 green chili,some curry leaves. Add salt when almost done and continue cooking till water is evaporated. Then drizzle about 1 to 11/2 tsp of coconut oil and give a good stir...
2. Washing with turmeric is done to avoid the blackening of plantain while cooking. If you avoid it the end result would be a slightly black stir fry. There wont be any change in taste.
3. Do wash the plantain 2 to 3 times to remove the turmeric from it.
4.Cook covered till its soft and then open and continue cooking to evaporate water, if there.


Monday, October 1, 2012

Rava Dosa

Rava dosa is a fave of many ...It is basically a crepe made of semolina along with rice flour and all purpose flour. They are usually thin and crispy with a lovely golden color. These crepes are prepared without fermenting. They look quite simple to prepare and are simple but you need to practice it. May be the initial few times you wont get it perfect crispy and lacy but dont worry it will be easy after few attempts...Speaking out of experience...:)
Initial days my rava dosa was terrible..They were thick and never got the golden color.Slowly I learned to master it and now it is just perfect for our liking...I have added all the points in notes..do check it out if planning to prepare this.


Rava-1 cup(fine variety)
Rice flour-1/2 cup
All purpose flour-1/2 cup
Onion-1/4 piece(finely chopped)
Curry leaves-3 to 4 leaves(finely chopped)
Coriander leaves-2 tbsp(finely chopped)
Green chilies-1 no(finely chopped)
Ginger-1tsp(finely chopped)
Mustard-1tsp
Hing/asafoetida-1/2 tsp
Cumin-1 tsp
Salt to taste
Water-4 cups
Oil-1 tsp
Ghee/Oil to drizzle.


Method of Preparation:
1. Heat oil in wok and splutter mustard and set aside.
2. Mix all the ingredients including mustard and oil with water to form a thin batter.Add more water if needed. Set aside for 15 mins.
3. Heat a griddle on high till its very hot and slightly smoking.Use a ladle and drizzle the batter on to the hot tawa. See that you dont pour lot of batter in one spot.
4. Reduce the heat to medium and then drizzle ghee/oil on top of the dosas. These help to make them crispy, so use liberally. Cook for 2 to  3 mins approx. till it turns golden brown..
5. These dosas are real thin so you need not flip and cook it, if you still want to then go ahead and cook for less than a minute.
6. Serve hot with chutney/pickle/sambar.


Notes:
1. I use non stick pan. You can use iron griddle too, then the time to heat the griddle should be a little longer.
2. You can either drizzle the batter on the griddle or you can pour it from the outer side of griddle to inner side.You can't spread the batter as you would with normal rice dosas.
3. Each time before making doasa see that the griddle is hot.
4. After making few dosas if the batter looks thick do add water to it to make it thin.
5. When I say thin it should be thicker than water. Not as thick as our normal dosa batter.
6. The flour tends to settle at the bottom so always mix it with a ladle before making dosas. Do this each time u make dosas.
7. If you want the dosas not so crispy, take them when it is lightly golden.
8. You can add a little more maida if the dosas are not coming proper. I do with this proportion and never did that.
9. Addition of mustard seeds + oil is not compulsory You can omit them. So is asafoetida.
10. 1/4 piece of onion means small piece, 1 to 2 tbsp.
11. Do not be reluctant to drizzle oil/ghee it adds to the taste and to make the dosas crispy.
12. To get that holes(lacy effect) the griddle should be very hot.


ShareThisFinal

LinkWithin

Related Posts Plugin for WordPress, Blogger...